Recently, I had a chance to ask WWI Historian Pete Belmonte about his latest projects, history and genealogy.
1. What is your latest project?
I’m continuing to research and write about immigrants from the Province of Cosenza, with Volume 3 almost finished. It’s a challenge on several levels. First, it is hard to find information for many of the men. Often the only indication I have that a man was a WWI veteran is the 1930 census which shows veteran status; but that’s not always accurate, and I’d like to find corroborating evidence in such cases. Ancestry.com makes it easy to find information on some men. Men who lived in New York or Pennsylvania, to cite just two examples, will have their statement of service cards on Ancestry.com, and Pennsylvanians have their Veteran’s Compensation application there, too. It may take some digging, but you can generally find something.
Second, it’s hard to know when to stop and put the draft copy to bed. I keep digging, and I keep finding men who should be included. It’s essentially a genealogy project. It combines immigration, social, and military history. I’ve curtailed the amount of strictly genealogical information in each entry because of space considerations and because I wanted to focus on the military history of the men.
And third, the topic is so broad — there were thousands of men from the province who served — it just seems overwhelming. I’ve documented more than 1300 men, but I’ve published material in the two volumes for only about 400 men.
2. What got you interested in your latest project?
It started as a genealogy project. I had traced my family back to the early 1800s in an area in Calabria in southern Italy. I knew most of the surnames involved and where they settled in the United States. Some of my family settled in Kenosha, Wisconsin, where there was a large “colony” of families from this Calabrian area. I went to the Simmons Library in Kenosha, to conduct some research, and their vestibule is beautifully decorated with the names of all the men from Kenosha who had served in World War I etched into the marble walls. Looking at this monument, I identified at least 50 men with names that originated in “my” Calabrian area; furthermore, I identified at least two men who were related to me, cousins of my grandparents. As I researched further, I dug up more information; I then expanded to try to find men who settled in other areas, most notably in Chicago. After twenty years, I identified and collected information on 140 men from two villages who served in the US military during World War I. After writing that book, I expanded my search to try to document men from the Province of Cosenza, the larger area that the men hailed from.y
3. What records should genealogists be using that they probably are not?
I don’t really know what most genealogists are using. For my work, I rely heavily on Ancestry.com. Once you get used to the methods of research, it almost develops into a rhythm of checking the various sources for, in my case, military service. In that regard, I found that many immigrants were naturalized while serving in the military during WWI. By checking passport applications, 1919-1925, I’ve found many cases where the man’s naturalization was annotated on the application, and that points to a specific time and place of military service. Maybe that’s all I can find for a given man, but at least I have something!
4. Did you have a favorite unusual case/find during this research?
I found poignant stories about men who were killed in action. By using the Burial Information Files from NARA I’ve found examples of confusion among surviving family members as to the desires for the final disposition of the body. I’ve found men who were badly wounded and listed as killed in action; men who were prisoners of war. Best of all is that I have found a few cases where I can get either first or second hand accounts — usually brief — of the serviceman. And it’s always great when family members send me scans of photos of the serviceman in uniform.
Also, as a military historian, I’m interested in some of the more unusual units some of the men served in. Labor companies, administrative units, an Army ship repair unit, etc.; I’ve very interested in those histories.
5. Have you considered what your next project will be?
I’m going to continue to research and write about the Cosenza US WWI veterans. Other than that, I’m working on papers and articles for either the Journal of the Company of Military Historians, of which I’m a member, or for presentation to various historical society conferences. Some topics I’m working on: US Army Air Service construction units in England in World War I; an article about the first US military members killed in action during WWI — a German airplane bombed a US Base Hospital in September 1917 killing four men; and an obscure topic: a study of men from Racine, Wisconsin, who were drafted into the Army during the week before the war ended (I have a reason for such an odd topic!).
As far as a purely genealogical project, I want to self-publish a book containing the history of each of my distant relatives who served in the US military during world war one. This will combine my love of family history and military history. By comparing family trees with other researchers, and by using DNA matches, I’ve been able to find about 20 men who are distantly related to me and who served in the military during the war. Bear in mind that these are, for the most part, distant cousins, but such is the obsession of the historian and genealogist!
Peter L. Belmonte retired from the US Air Force after having served for twenty years, first as an enlisted man and then as an officer. A veteran of Operation Desert Storm, he holds a master’s degree in history from California State University, Stanislaus, and a bachelor’s degree in mathematics from Purdue University. He has published articles, book chapters, reviews, and papers about immigration and military history and has been a college adjunct instructor of history.
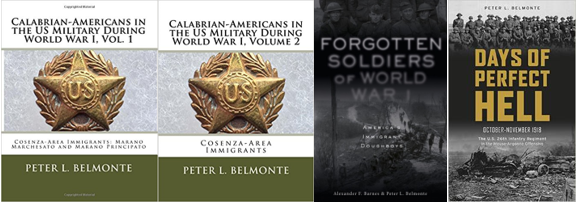
Pete has written five books: Italian Americans in World War II (2001), Days of Perfect Hell: The U.S. 26th Infantry Regiment in the Meuse-Argonne Offensive, October-November, 1918 (2015), Calabrian-Americans in the US Military During World War I, Volumes 1 and 2 (2017), and America’s Immigrant Doughboys: The Forgotten Soldiers, 1916-1918 (with Alexander F. Barnes, forthcoming).
He currently works for the Department of Defense and lives with his wife and children in Illinois.
People can find out more about his books at: www.amazon.com/author/peter.belmonte
Thank you, Pete!