Google NotebookLM Tutorial

Blog Banner Google NotebookLM Tutorial

This is it! You have decided to give Google’s NotebookLM a try!

Maybe you want step-by-step instructions, or just want to look over the process before diving in. Either way, this tutorial stands ready to help.

What will you do in this Notebook? One suggestion is to upload a group of documents related to a subject or ancestor. These are documents that you want to understand better or analyze. Don’t overthink it. You just need to have an idea of your subject, because once you begin to use the Notebook more ideas will probably come to you.

In this tutorial, we’ll get started with a brand new NotebookLM, add documents to it, then based on those documents generate an Audio Overview, an Infographic, a Slide Deck and a Video Overview.

NOTE: For this tutorial, keep in mind that Google may change how it looks or add/remove specific functionality and labels at any time, but the basic ideas will remain.

When you have decided the topic for your Notepad, it’s time to get going and create it.

In my example I will add only a few documents: the homestead patents and pages from the tract books for Charles F. Gilroy.         

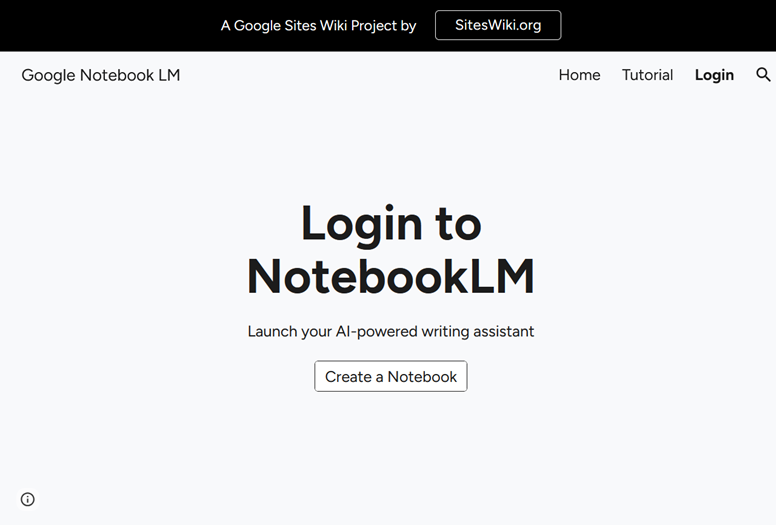
Here’s the link:

https://sites.google.com/view/notebook-lm/login

NotebookLM Login Page

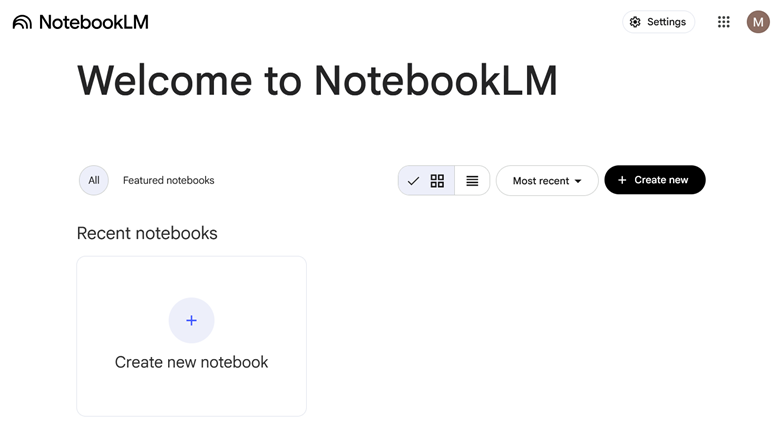
Login to your Google account here. If you are already logged into Google in the same browser, you may go directly to this page:

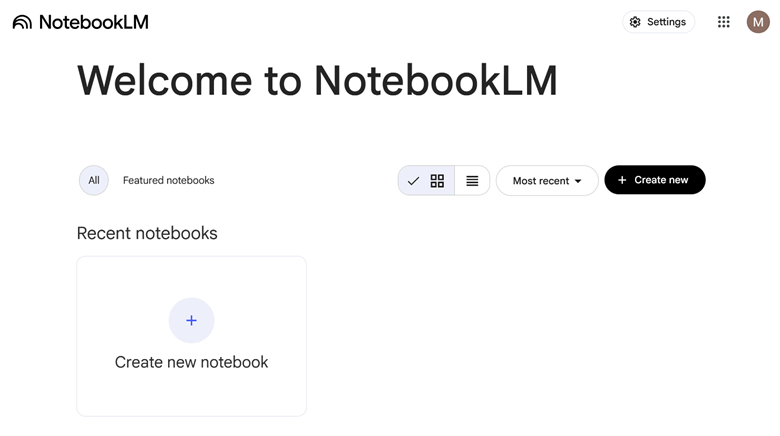
NotebookLM Welcome Page

You’re in!

Select Create new notebook to start.

After you have created a new notebook, a window pops up asking you to add media. (This is the same window that will open when you select + Add sources)

As of this writing the Notebook supports: Google Docs, Slides, PDFs, text files, web URLs, YouTube transcripts, and audio files. When you enter a link a YouTube video, only the transcript will be used and the video has to be public.

For best results, enter documents with text in them. There is no guarantee that images will be transcribed properly.

From this window you can drag and drop the files you want to add to your Notebook.

NotebookLM adding sources

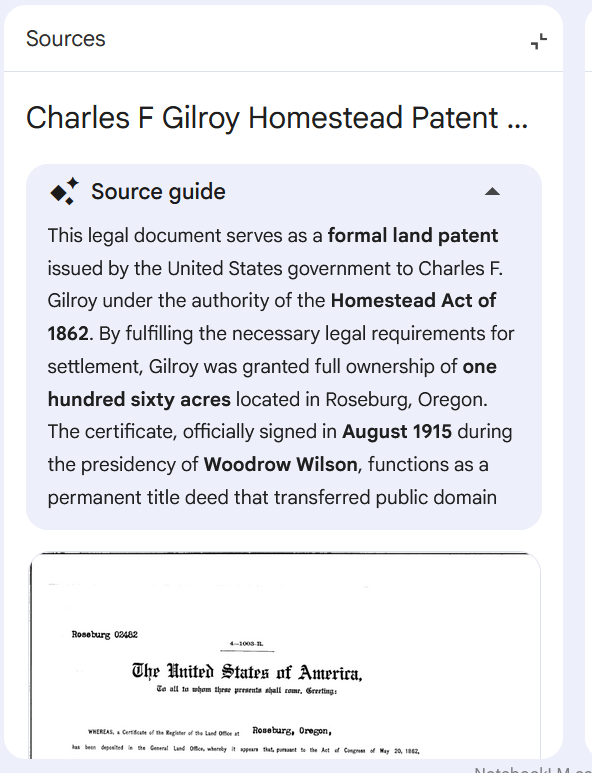
When adding to this Notebook, I have to admit that I did not follow the text-is-best rule. That means I will need to verify the transcription that the Notebook is using was done correctly. I added Land Patents and Tract Book images. (The Tract Book images had been located by FamilySearch Full-Text Search!)

On the left, I selected one of the sources, and viewed a description of the document containing key information from it that had been extracted. 

NotebookLM Source Guide

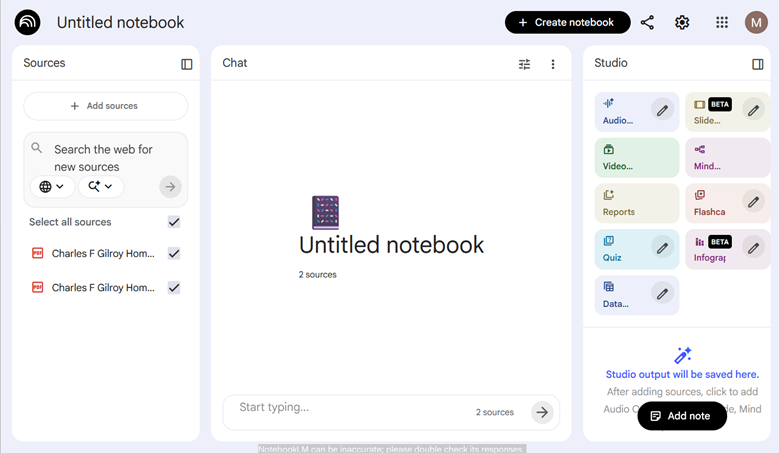
The workspace that opens is called the Notebook, and it has three windows labeled: Sources, Chat, and Studio. The first two are self-explanatory.

The third window is the Studio Window, which is also called the Studio Panel.

There are two sections within the Studio Panel. One section is home to the buttons, called Action Tiles, where you ask the Notebook to generate complicated multimedia products. By selecting an Action Tile, the Notebook to generate audio or visual presentations, infographic, slide decks, reports, mind maps and more. At this point, several Tiles are labeled “Beta” which means they are almost ready to be full-fledged features but are still being evaluated. Do not let that dissuade you from trying them! Test them out for yourself.

The second section is the Generated Resource List. When you request a product, you will see it added to that list. The list is empty for a new Notebook. As you choose products, the list is populated with the generated media. Next to each resource in that appears in the list there is a 3 dot menu (snowman) where you can Rename, Download, Share or Delete a resource. When you rename a resource, that changes only the name and does not change any of the media’s content.

NotebookLM three windows

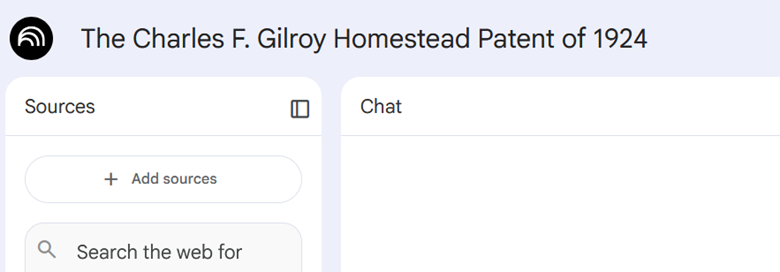
After uploading the documents, a name for the notebook was automatically generated.

NotebookLM Sources Window

I renamed the Notebook.

NotebookLM after updating Notebook name

Audio Overview

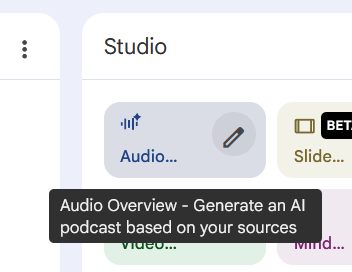
First, I tried an Audio Overview based on the few documents I had uploaded. This action offers to “Generate an AI podcast based on your sources.”

NotebookLM Audio Overview Tile Detail

Documentation for the Notebook had explained that it may take some time for the Audio Overview to be generated.

NotebookLM Studio Panel Audio being generated on Generation Resource List

Within minutes, I was listening to audio in a podcast format of two people explaining and discussing the documents and their context in a pleasant conversation presentation. It was 19 minutes, 12 seconds in length.

NotebookLM Studio Panel Audio on Generation Resource List

A clip from this audio is here:

Infographic

Next, I decided to generate an Infographic based on the documents.

NotebookLM Infographic Tile Detail

In the Generated Resource List at the bottom of the Studio Panel, there was a spinning circle to indicate that the infographic was being generated. When it was done, I could select it from the list.

I clicked on the Infographic in the list in the Studio window

NotebookLM Studio Panel Infographic on Generation Resource List

and a Viewer opened up. I had options to share, download, collapse the Viewer and close the Viewer in the upper right hand corner.  

NotebookLM Infographic Window

After I closed the Viewer, I could click on the snowman (3 dot menu) and to be presented with options: Rename, Download, Share, Delete

This is one of the features that in BETA, but the infographic that was generated was interesting.

Slide Deck

An option is to generate a Slide Deck. At this time, this feature is in BETA.

NotebookLM Slide Deck Tile Detail

I selected Slide Deck and waited while it was generated

NotebookLM Studio Panel Generation Resource List Overview

When I clicked on the Slide Deck in the Resource List, a Viewer opened up where I could look at the slides, and interact with them.

NotebookLM Slide Deck overview window

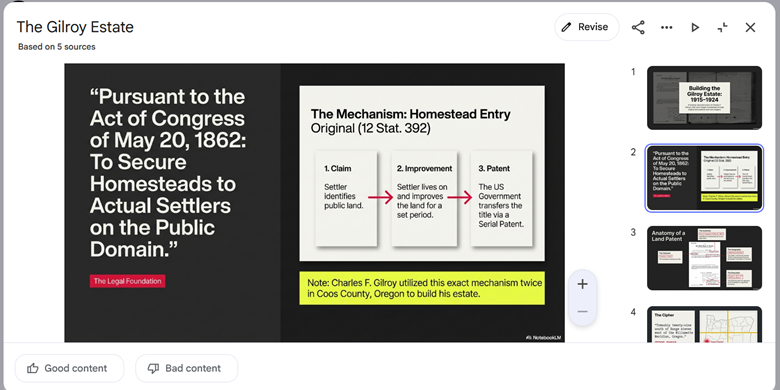
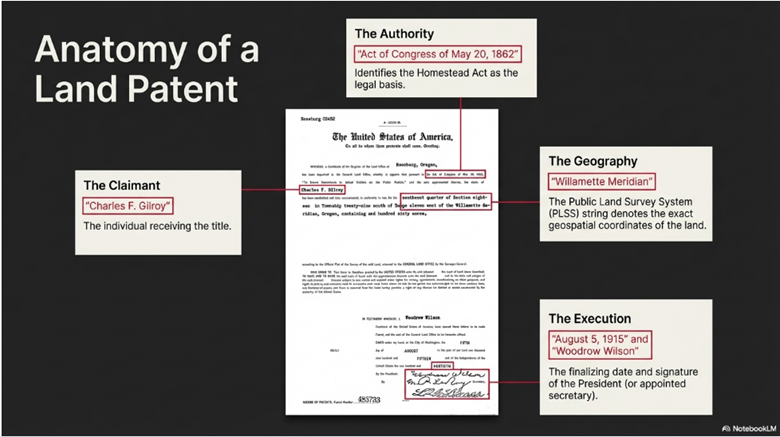
I particularly liked this slide

NotebookLM Generated Slide

NotebookLM Generated Slide

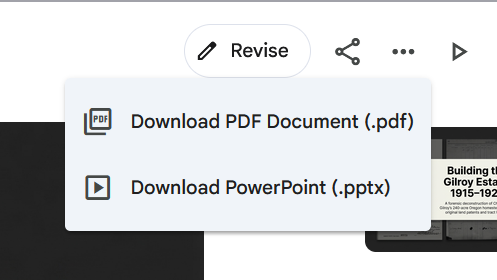
I also liked the option to download the slide deck as a PDF or a PowerPoint document.

download the slide deck as a PDF or a PowerPoint document

Selecting “Revise” gives you the chance to interact and make change to the slide. The pending changes will be generated in a few minutes (or longer).

Video Overview

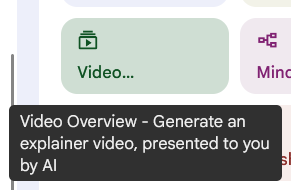
I selected the Video Overview Tile

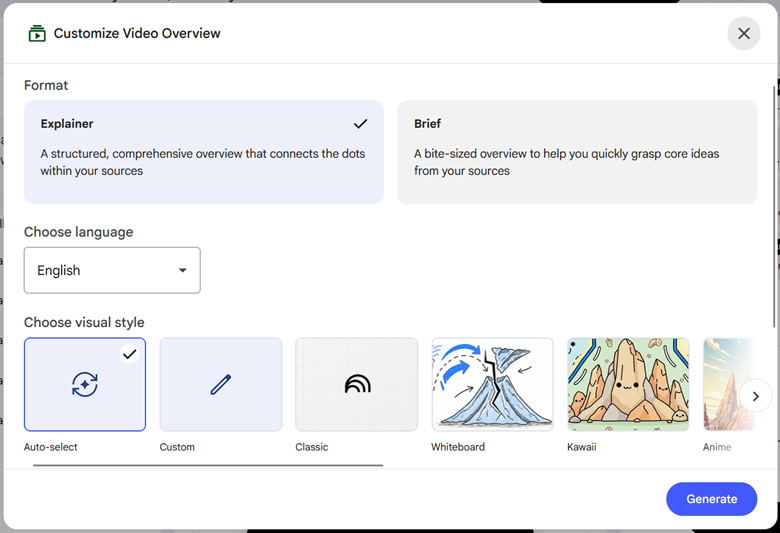
and accepted the default selections, which included the longer Explainer format.

NotebookLM Customize Video Overview Window – Explainer Format

Generating that video took a long time. When I quizzed Gemini if I could find out how long it took to generate a product, I was told no, but that this task usually took from 5 to 30+ minutes.

NotebookLM Generated Resource List

At the end of that response, Gemini asked me if generating was taking a long time, and when I said yes, Gemini recommended that I refresh the webpage because the user interface had not updated. When I followed this recommendation, it appeared that the Video Overview generation had failed.

NotebookLM Generated Resource List – Video Overview failed

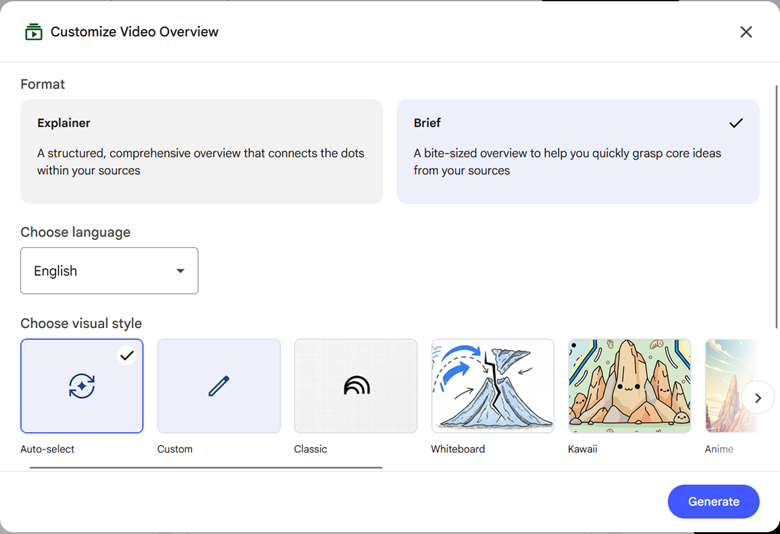
I deleted the Video Overview entry on the Generated Resource List, and tried again. This time I selected the option for a Brief Format.

NotebookLM Customize Video Overview Window – Brief Format

The brief format video was generated within minutes, providing me with a video 1 minute and 50 seconds long.

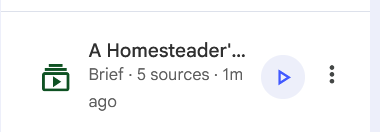
NotebookLM Generated Resource List – Video Overview

When I clicked on the Video Overview in the Generated Resource List it opened a window within the Studio Panel. The video gave the context of the Homestead Act then dove into presenting data about the two homesteads’ and their patents.

An excerpt from the video:

An Experiment in the Chat Window

I have engineering experience in testing, which matches my style of pressing the buttons and trying the features. That made me want to see if I could get some general information in a Chat within the Notebook.

I asked in the Chat window of the Notebook: If I upload a Word document with newspaper clippings can you transcribe all of them?

This was answered literally, using only the data within the Notebook. (At that point, there was no Word document in the sources containing newspaper clippings.) So if you have a general question that is not based on the information loaded into the Notebook, or have a question about how NotebookLM works it would be better to ask it in Google so that Gemini can answer it.

Gemini told me that “…if the clippings are embedded as images (e.g., photos or scans of newspaper pages), NotebookLM may not automatically transcribe that visual information into searchable, readable text” reminding me that “NotebookLM is designed to work with machine-readable text. If your Word document contains photos of newspaper clippings, the AI may be unable to “read” or transcribe the text inside those images.”

Getting back to my Notebook

When you need to revisit your Notebook, or login on a different computer, you can choose it from your list of Recent notebooks.

NotebookLM Recent Notebooks

Current Limitations

According to Gemini, currently free accounts have limits of generating approximately 3 Audio/Video Overviews per day, and can only send 50 chat queries per day. The Free accounts are limited to 50 sources per notebook, and are limited to 100 notebooks. (Workaround for large projects: Try combining multiple, smaller documents into a single PDF or Google Doc before uploading.)

Google has a tutorial that provides good information in an overview, and it can be found at: https://sites.google.com/view/notebook-lm/tutorial

Give this a try and explore the Tiles and Chat. Let me know how you do.

Have You Tried Google’s NotebookLM Yet?

Blog post banner - have you tried Google's NotebookLM Yet?

Trying out NotebookLM has been on my to-do list for months. I just did, and I was blown away by it. The accessibility of technologies that I knew existed but had so well not seen integrated was impressive. You can chat with the AI about what has been added to the Notebook, and you can generate products based on what the uploaded documents. The AI-generated media and responses in the Notebook are all based on the documents that you upload to it, which should reduce the opportunity for AI hallucinations. Keep in mind that the best idea is to enter documents with text; there is no guarantee that images will be transcribed properly.

I had already identified a couple of ancestors as test cases. One is all-time family favorite who was born and raised in Newport, Rhode Island, served in the Army during Spanish-American War, then settled on a homestead out in Oregon. He was a poet and a raconteur who loved to travel and was always involved in social movements.

Another ancestor is one of my brick walls. He is the only German immigrant in my tree (so far), and while I have clues about his origins in Germany, I cannot pin down his arrival to the United States or from whence he came. What I have learned about him is in the U.S., and begins when he was married to an Irish woman, after he had anglicized his name. From the time of his marriage, he never lived near other German immigrants. Very knowledgeable and generous researchers in Brooklyn, New York, and in Germany have helped me follow up on the very limited clues I have developed. The ability to pull together the material and look at it from different perspectives has the potential to help with this brick wall.

If you have not had a chance to try out NotebookLM, here is the link:

https://sites.google.com/view/notebook-lm/login

NotebookLM Welcome Page

If you are interested, I have put together a step-by-step tutorial that will get you started here: Google NotebookLM Tutorial.

Finding WWII Rosters Online at NARA

Blog post Banner  Finding WWII Rosters Online at NARA

For researching a WWI or a WWII soldier, have you considered using the Rosters at NARA? They are located Series: Muster Rolls and Rosters, November 1, 1912–December 31, 1943 within Record Group 64. This blog post will show where to search for rosters, including how to use an online finding aid for finding WWII rosters that will make your task much easier.

The rosters are arranged in three subseries within Muster Rolls and Rosters, November 1, 1912–December 31, 1943:

  • Muster Rolls, November 1, 1912 – June 30, 1918 and Enlisted and Officer Rosters, July 1, 1918 – December 31, 1939,
  • Officer Rosters, 1920 – 1939,
  • Army and Army Air Force (Air Corp) Rosters, 1940 – 1943

The Series is located at: https://catalog.archives.gov/id/85713803

There are 625 pages of links viewing on this Series webpage, so you can browse for an organization.

First page of Series: Muster Rolls and Rosters, November 1, 1912–December 31, 1943

You can also search within the Series for a soldier’s name, military serial number, or even an organization: https://catalog.archives.gov/search-within/85713803

Search within Series: Muster Rolls and Rosters, November 1, 1912–December 31, 1943

When researching WWII soldiers, there is an online finding aid to streamline the process: https://www.archives.gov/st-louis/archival-programs/army-rosters-1940-1943

Finding Aide for Army Rosters 1940-1943 Online

On this page, you will find information about how to locate WWII rosters organized by:

  • Army enlisted service members
  • Army officers
  • Army Air Force (Air Corp) enlisted service members
  • Army Air Force (Air Corp) officers

Within those categories, the rosters are organized by type of reporting unit.

Table for RG 64, Series: Muster Rolls and Rosters, November 1, 1912–December 31, 1943 Subseries 3: Army and Army Air Force (Air Corp) Rosters, 1940 – 1943

To use the finding aid, click on the plus sign to expand the link to locate the type of unit. There will be box numbers shown, but some entries will contain links to digitized rosters, or to a pdf that contains the National Archives Identifier (NAID) in NARA’s Catalog to use when locating the online rosters.

In this example, I am searching for the rosters for a soldier in Battery A of the 500th AAA Gun Battalion, so clicked on the plus sign next to “Chemical and Antiaircraft Artillery” to expand the section.

Finding aid webpage for AAA Battalion rosters

I licked on the link for “Antiaircraft Battalion – Boxes 246-348.”

The link led to a PDF file with the Catalog NAID.

https://www.archives.gov/files/antiaircraft-artillery-battalion-index.pdf

The PDF file shows that the rosters are stored by increasing NAID numbers, by the number of the organization.The first page contains the column headers. (They are not repeated on subsequent pages.)

Finding aid file for AAA Battalion rosters

Scrolling down to the beginning of page 4 of the PDF, I find Btry C, 500th AAA Gn Bn, 1943. That means Roll Number 307 (2 of 3), which begins with Battery C of that Battalion has NAID Identifier 371744319.

Finding aid file for 500th AAA Battalion rosters

Since the soldier is in Battery A, I will want to check the previous part of the roll, listed at the bottom of page 3 of the PDF, NAID 371744318, Roll Number 307 (1 of 3). I would expect that rosters for Battery A would be closer to the end of the Roll. (Remember to use the Chrome Browser to see the images in order, as Firefox has a documented bug of showing images in reverse order.)

I searched from the NARA Catalog Home Page: https://catalog.archives.gov

Roster Roll for 500th AAA Battalion

There is a blank page between the months, so I began by checking the image after the blank pages in the image range of 800-900.

I recommend building a list or a table with the information for the organization, to keep track of links. (Note: Organization and Link appear in the same column for readability. In my Excel worksheet, they appear in separate columns.)

Table for tracking Roster images, links and dates

I would want to continue to go backwards chronologically to collect the rosters for the time the soldier I am researching was in the Battery.

Another option, as described in our blog post about locating WWII Morning Reports in PDF Files can also make the task easier. Search the NARA catalog for: 371745320, which is the NAID for the final part of the Roll Number 307, part 3 of 3.

PDF files of images available for download

From there, the PDF files containing groups of 125 images from the Roll can be downloaded. Images for Battery A can be found in the files Roll-0307_07.pdf and Roll-0307_08.pdf

Give it a try and let me know how you do!

Now Open: “Tracing Your New York Ancestors with the NYG&B”

Are you researching Ancestors in New York State? If so, you will probably be interested in the free on-demand online course from The New York Genealogy & Biographical Society: “Tracing Your New York Ancestors with the NYG&B.”

In the six video sessions of the course, you will learn about NYG&B, its services, membership and publications. The sessions cover the use of their online collections.

When you sign up for the course, you have 60 days to complete it. During that time you can review the on-demand lectures and revisit the materials. When the 60 days expires, you can re-register for the course again. When you complete the videos for all the sessions you can enter your name to receive a personalized digital certificate.

NYG&B Certificate

The opportunity to learn about the resources of the NYG&B through the sessions given by their esteemed experts is terrific. The information that I found most interesting were about the resources available on their website, addressing how to navigate their website and ways to search their databases. The demonstration of how to search their collections through the New York Public Library catalog were invaluable.

It was fascinating to learn about the products created by the scholars in residence, who have created work about the resources at the NYG&B. Those products are available on the website, and might be leveraged in our own research.

Insights into the educational programs and how to use the tools were also important parts of the course. Be sure to download the handouts that accompany each class.

You can register for the online course, as well as learn about the sessions and presenters at: https://www.newyorkfamilyhistory.org/tracing-your-new-york-ancestors-nygb-registration

Book Review: Your Stripped Bare Guide

blog banner - Book Review Your Stripped Bare Guide

Having earned a Ph.D., worked as a professor, and published research, I know that citing sources is essential in academic work. Having published in multiple disciplines, I have used different styles of citations and variations of those styles. Students can usually understand why direct quotations need to be cited, but do not always grasp why the facts they use in their writing must also be attributed. The methods in technical papers are explained so that they can be reproducible. For a technical discipline, citations can be used by readers to go upstream to the authoritative sources and investigate the source material for themselves. Those sources are typically published and readily accessible.

Genealogical writing is different. Using historical sources can be far more complicated. They are evidence of the past events, which support interpretations of that past. The access to an historical source may limited. A source may exist in one location with restrictions limiting its physical access, which means that readers may not be able to examine the source themselves. A source may have been destroyed or lost, leaving us with only an image or description of it. It may exist only in the private files of a researcher or in unpublished manuscripts. Primary sources may also be subjective, which introduces another layer of evaluation. Therefore, citations of historical sources need to convey to readers the information about the source and the implications about its reliability.

This is where Your Stripped Bare Guide to Citing & Using History Sources becomes invaluable. Ms. Mills wants us to understand why and how to do this effectively. Improving how we cite our sources will result in better products. As we evaluate our sources our citations present evaluation of their reliability to others. She guides us as we turn our evidence into proof.

There are sobering thoughts throughout this book. Without DNA evidence, attributing relationships between individuals in the past is built on trust in the informants. The authenticity of a tombstone image downloaded from an online cemetery website differs from that of an image we photographed on our own in-person visit to a cemetery.

All sources are not created equal, nor do all have the same weight when considered as proof. From the very start of our research, we need to not only be tracking where our sources come from but evaluating them as we collect them. We must also be wary of bad data; multiple references to it should not be mistaken for proof of its veracity. There is a good reminder to put full citations on the front page of all our notes or copies of documents.

Enjoy the guidelines for analyzing evidence. The book also includes universal templates and construction notes for our use, including templates for the daunting layered citations with an explanation of why they are important. While you might be tempted to ignore Appendix One until you need to define terms, I recommend that you review it early to make sure that you understand the language of citing and using historical sources. (The first term you look up should be “q.v.”)

Consider allowing Ms. Mills to guide you toward stronger, clearer, more reliable research!

The book can be found at: https://genealogical.com/store/your-stripped-bare-guide-to-citing-using-history-sources/

Note: A review copy was provided by the publisher.